

Refinish Table High Gloss or Gloss
The DIY Guide to Finishing a Table Top
34 tips for drinking glass-smooth tabletop finishing perfection
Introduction
Finishing a tabletop is tricky. On a big table especially, coating the unabridged surface earlier the cease becomes too viscous is the ultimate test of speed and skill. And your work has to be perfect. More than any other furniture surface, a tabletop reflects lite and shows off every little flaw. Simply that doesn't mean y'all can't practise it. These tips volition make the tough parts easier and aid you achieve a perfect finish.
Follow these foolproof tips and tricks for finishing a tabletop to flawless perfection.
Video: How to Sand Wood Past Manus
Project footstep-by-pace (34)
Stride 1
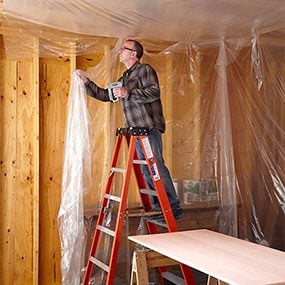
Tent the Work Area
- Open up rafters and trusses are an endless source of falling grit. And then if y'all're working under an open ceiling, hang plastic sheeting to a higher place. Keep the plastic at to the lowest degree 12 inches from light fixtures or remove the bulbs. Sometimes, adding plastic 'walls' is a lot easier than cleaning up the entire surface area. If yous're using oil-based finishes, hang the sheets almost a foot from the floor to allow for ventilation.
Step two
Wet the Floor
- A floor dampened with a mop or spray bottle has two benefits: Information technology prevents you lot from kick upwards dust every bit you lot walk effectually. And information technology raised the humidity, so polyurethane dries slower and remains workable longer. Hither'southward how to pick the best dust mask.
![]()
Pace 3
Declare War on Grit
- Airborne grit is the wood finisher's nemesis. It settles on wet coatings and creates ugly bumps in the dried finish. Y'all can sand them out, but it'south better to minimize that labor past minimizing dust sources. Clean upwardly the work area and change out of the dusty apparel you lot wore while sanding.
Step 4
Limit Air Motion
- If y'all're using water-based finishes, control airborne dust by turning off forced-air heating or cooling, and by endmost windows and doors. This doesn't apply to oil-based finishes, for which ventilation is required to remove harmful fumes.
Step five
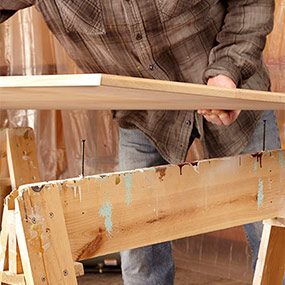
Prop Upward the Tabletop
- Set the top on screws so you tin can easily finish the edges.
Step six
Customize Your Lighting
- Overhead lighting is dandy for virtually shop work, but it'southward bad for finishing. Try this instead: Plough off the overhead lights and position a bright light iv to 5 feet off the floor. The depression-angle glare will highlight every flaw.

Step vii
Remove the Legs
- A disassembled table is much easier to movement and the legs are easier to finish. On a typical table, removing each leg is every bit simple equally unscrewing a nut.
Step 8
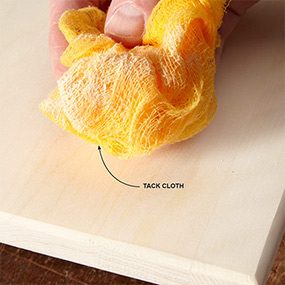
Vac and Tack
- A vacuum with a brush attachment will remove 99 percent of the sanding dust. But that'south not enough. This photo shows how much grit is left over. After vacuuming, wipe with a tack cloth (bachelor at domicile centers) if you plan to use oil-based stain or coatings. If you're using h2o-based finishes, use a lint-gratuitous rag dampened with mineral spirits.
Step 9
Avoid Regrets
- The very all-time way to avoid woods finishers' remorse is to exam your finishes on woods scraps of the aforementioned wood species as your tabular array. Sand the scraps in exactly the same way you sand the table: Sanding lighter or harder or using unlike grits volition change the look of whatsoever finish you apply.

Stride 10
Do a Final Sanding by Hand
- A random orbital sander is perfect for most of the sanding. Merely do a five-minute final sanding by hand using the same grit. Hand-sanding with the grain removes swirls and torn woods fibers left by the orbital activity of the sander.
Step 11
Sand Every Square Inch the Aforementioned
- Any variation in sanding steps tin show upwardly in the last finish. If, for example, you run out of fourscore-grit sanding discs halfway through the initial sanding, you might be tempted to switch to 100-grit. Don't. Even afterward sanding with higher grits, the stain may await different in differently treated areas.
Step 12
Don't Over-Sand
- Most professionals finish at 150-grit on coarse-grain wood like oak or walnut and 180-dust on fine-grain woods similar cherry or maple. Merely that doesn't employ to finish grain. End grain shows sanding scratches more face grain, then you may accept to sand to 220- or even 320-grit.
Footstep 13
Skip Grits When Sanding
- Y'all don't have to use every available grit as you progress from coarse to fine. Instead, yous can jump from eighty-grit to 120- to 180-, skipping 100-and 150-grit.
Stride 14
Inspect Your Sanding Work
- Stain will highlight any flaws in your sanding task (swirls or cross-grain scratches). And so y'all'll have to resand — and sanding stained wood is a real hurting. To find flaws earlier you stain, use low-angle light. Wiping on mineral spirits also helps to reveal problems.
Step fifteen
Avoid Blotches When Staining
- About common woods species — pine, birch, maple and cherry — absorb stain unevenly. For a more consistent end, apply a pre-stain conditioner.
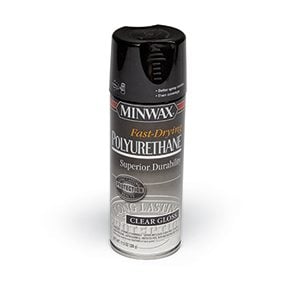
Step 16
Start with High-Gloss Poly
- A few coats of semigloss or satin polyurethane look like a sheet of dull plastic over the wood. Then build upward coats of gloss poly starting time. And then, if you want less sheen, ho-hum the finish by wet sanding or wiping on a couple of coats of satin or semigloss.
Step 17
Go with Polyurethane
- In that location are lots of articulate finishes. Only for a combination of usability and immovability, y'all can't beat polyurethane. Oil-based poly, which dries slower than water-based, is all-time for beginners because it allows more working time. The other important divergence is clarity: Water-based poly is absolutely colorless, while oil-based has an amber tone, which tin be good or bad depending on the look you want.
Step 18
Use Water-Based Poly with a Pad
- H2o-based poly dries faster than oil, so it's fifty-fifty harder to brush over a big surface. The solution is a paint pad, which applies poly fast and smooth. Just dip the pad into a pan of poly and drag the pad across the surface. Be sure to smooth out any ridges pushed up by the edges of the pad.

Step xix
Work Fast
- Depending on the conditions, oil-based poly may go likewise sticky to work with after just five to ten minutes. Water-based poly dries fifty-fifty faster. And so have all your supplies lined up and ready to get before you kickoff. And once you've started, at that place's no time for java or bathroom breaks.
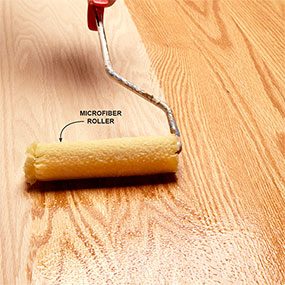
Stride twenty
Gyre on Oil-Based Poly
- Coating a large surface with a brush — before the poly becomes gooey — requires speed and skill. Rolling is faster, easier and almost goof-proof. Rolled-on poly looks terrible at first, but the bubbling disappear in minutes, leaving a smoother surface than most of us tin can achieve with a castor. Beware of ridges formed past the edges of the roller and humps where you first and cease. You lot tin minimize both of those flaws past applying lighter coats. We experimented with several kinds of rollers and got the best results with microfiber mini rollers. Nosotros too tried rolling on water-based poly; don't do information technology.
Stride 21
Sand Between Coats
- A quick mitt-sanding betwixt coats flattens our flaws earlier the next glaze. Polyurethane tends to mucilage upwards sandpaper, then use paper or pads that resists clogging (320-grit). On shaped edges, utilize synthetic steel wool, such equally Scotch-Brite pads, labeled 'very fine.'
Footstep 22
Wet-Sand Before Terminal Coats
- Load a sanding block with 600-grit moisture/dry paper, dribble on some soapy water and rub the finish smooth. Then wipe the table dry, wait for flaws and rub some more. Don't stop until yous achieve perfection. Smoothen shaped edges with synthetic steel wool.

Stride 23
Utilise at To the lowest degree Three Coats
- With a thicker layer of protection, damage to the underlying forest is less likely — and then your tabletop volition look better longer, and reviving the finish will be easier. Some finishers employ four or even five coats.
Pace 24
Make clean Off the White Stuff
- As the table dries after moisture-sanding, a white residue will appear. Be sure to clean information technology off completely. Rest left in the grain lines of coarse-grain forest will be trapped nether the terminal coat and haunt you lot forever.
Step 25
Don't Sand Through
- If you sand through the polyurethane and remove some stain, you tin touch up with more stain. But the repair won't be perfect, and then accept pains to avert that mistake. Sand very lightly after the first glaze, simply enough to remove the grit whiskers. After the second coat, you lot tin sand a trivial harder to flatten larger flaws. E'er be careful around the edges of the table; that's where it'southward easiest to sand through.
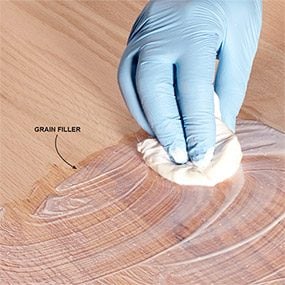
Step 26
Fill the Grain
- The deep grain lines in woods like oak or walnut will telegraph through the clear stop, no matter how many coats you apply. And that's fine; it's part of the graphic symbol of fibroid-grain wood. Merely if a perfectly smooth surface is the expect you want, utilise a grain filler. You'll detect several products online or at woodworking stores. With most, y'all wipe on the filler, squeegee off the excess with a plastic putty pocketknife and then sand later on it's dry for a smooth-every bit-glass surface.
Stride 27
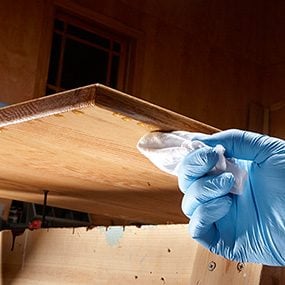
Wipe Abroad Drips
- After the table is completely coated, wrap a rag around your finger and wipe off whatever drips forth the underside.
Step 28
Keep an Center on Edges
- Regardless of how you lot apply poly, you'll likely stop up with some runs on the edges. So constantly check the edges every bit y'all work and be ready to smoothen out runs with a brush.
Step 29
Spray the Legs
Table legs — especially shaped legs — are almost impossible to coat smoothly with a brush. So instead, hang them from the ceiling with wire and spray them.
Step 30
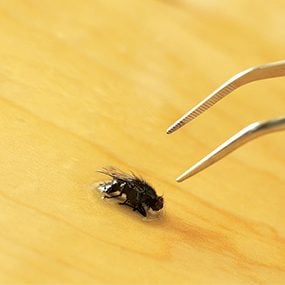
Pluck Out Problems
- Tweezers are an essential emergency tool. If a wing, castor bristle or slice of lint ends upward in the stop, you can surgically remove it.
Step 31
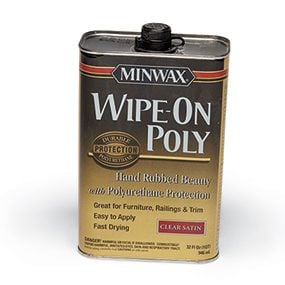
Wipe on the Terminal Coats
- Wet-sanding leaves the surface perfectly polish but dull. To restore the smoothen, apply ii coats of wipe-on polyurethane (available in gloss, semigloss and satin). Wiping results in a very thin, fast-drying coat, so flaws like dust nubs or sags are less likely.
Step 32
Coat the Underside
- Wood absorbs moisture from the air, shrinking and swelling with changes in humidity. Polyurethane (or any blanket) slows that assimilation. Then if you lot coat only the topside, the unfinished underside will shrink or swell at a different rate. That means a warped table. But one coat on the underside will stabilize the tabletop.
Footstep 33
Never Use Wax or Polish
- All y'all need for routine cleaning and care of your tabular array is a damp cloth. When normal wear eventually dulls the finish, y'all can renew information technology in just a few minutes with another coat of wipe-on poly. But if you've ever used furniture wax or polish, a fresh coat of poly may not stick.
Step 34
Seal Finish Grain
- The end grain of wood soaks up finishes and often turns much darker than the face grain. Check for this on your test block. If you get an ugly result, pretreat the end grain with a dose of finish that will limit assimilation (forest conditioner, sanding sealer, shellac or polyurethane thinned 50 percent). Apply the treatment with an artist's brush and exist careful non to slop onto the face up grain.
Originally Published: July 18, 2021
Source: https://www.familyhandyman.com/project/the-diy-guide-to-finishing-a-table-top/
0 Response to "Refinish Table High Gloss or Gloss"
Post a Comment